3D animation has become an increasingly popular and sought-after skill. Did you know that the global animation market is projected to reach a value of $587 billion by 2030? With such immense growth, it’s no wonder that many individuals are eager to learn how to create their own 3D animations.
This article serves as a comprehensive beginner’s guide, taking you through the step-by-step process of making 3D animations. Whether you’re an aspiring artist, a business owner looking to innovate their marketing or simply someone with a passion for technology, this guide will equip you with the essential knowledge needed to embark on your own 3D animation journey.
We will start by exploring the basics of 3D animation, understanding what sets it apart from traditional 2D animation. From there, we will delve into the step-by-step process of creating your own animations. We’ll cover everything from conceptualization and character design to bringing your scene to life and adding stunning visual effects.
Additionally, we’ll touch on advanced techniques for those looking to take their skills to the next level.
By the end of this article, you’ll have a solid understanding on how to make 3D animation and be well-equipped to bring your creative visions to life. So let’s dive in and explore this exciting world where imagination knows no bounds!
The Basics of 3D Animation
3D animation encompasses a complex and multifaceted process that involves careful planning, artistic creativity, technical skills, and collaboration across various stages, from concept development to the final output.
What is 3D Animation?
3D Animation involves the creation of moving images within a three-dimensional environment, using computer software or specialized hardware to give the illusion of digital objects moving through space. It is a complex process that requires technical expertise and artistic creativity.
2D vs 3D Animation
A comparison between 2D and 3D animation reveals the strengths and weaknesses of each technique in terms of realism, cost, and complexity.
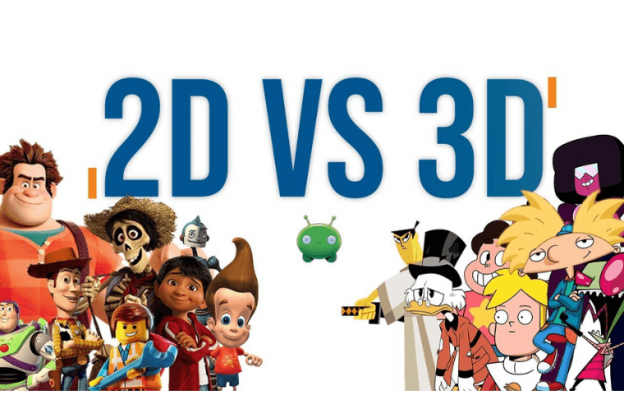
2D animation, created with drawings or paintings on transparent sheets, is less realistic compared to its 3D counterpart. However, it is also less expensive and time-consuming to produce. With 2D animation, artists can quickly create characters and scenes using traditional artistic techniques without the need for complex modeling and rigging processes.
On the other hand, 3D animation provides a greater sense of depth and scale due to its ability to create moving images in a three-dimensional environment. It allows for more realistic and complex movements, making it suitable for scenes involving flying, explosions, or large landscapes.
In terms of cost and complexity, 3D animation is generally more expensive and time-consuming than 2D animation. Creating a 3D model involves sculpting or clay modeling in a virtual 3D space using software like Autodesk Maya or Blender.
The process requires attention to detail as models are made up of polygons, with adding more polygons adding more detail to the model. Texturing adds the desired look and feel to the model through UV unwrapping and painting in software like Photoshop or Substance Painter.
Rigging is another crucial step in 3D animation where a skeleton system is added to the model to enable realistic movement. Rendering then brings all these elements together by generating the final animated sequence with added visual effects like shading, texture mapping, shadows, reflections, etc.
Overall, while both techniques have their strengths and weaknesses in terms of realism, cost-effectiveness, and complexity; choosing between them depends on the specific requirements of the project at hand as well as budgetary constraints.
How to Make 3D Animation: Getting Started
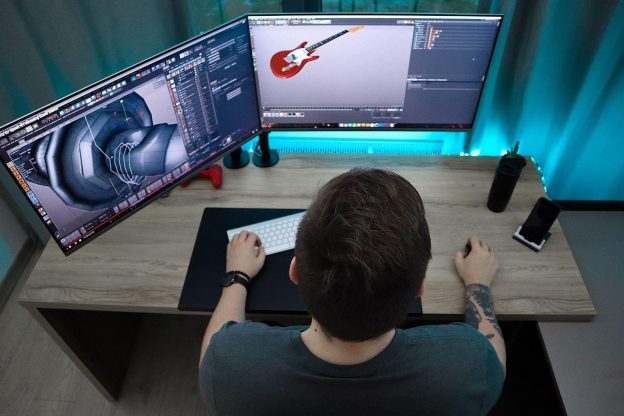
To embark on the journey of creating a 3D animation, one must first understand the fundamental principles and techniques involved in this complex process. Whether you’re an aspiring animation maker or interested in video production, learning how to make 3D animation can be a rewarding experience. Here is a step-by-step beginner’s guide to help you get started:
Sub-lists:
By following these initial steps, you will be well on your way towards creating your own stunning 3D animations. Remember to practice regularly and continue expanding your knowledge as you delve deeper into the world of animation creation.
Now let’s get into the main process of making 3D animations.
Step 1: Conceptualization
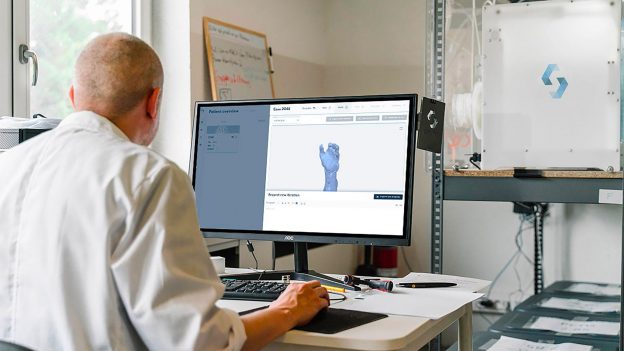
Conceptualization is the initial phase of the animation production process, where the original idea or storyline for the animation is developed and refined through thorough scriptwriting and visual development. This step is crucial as it sets the foundation for creating engaging and meaningful animations.
During conceptualization, artists and writers brainstorm ideas, explore different narratives, and develop a clear vision for the animation. They focus on refining the script, ensuring that it has a strong structure, compelling characters, and an engaging plot. Companies like Pixar are known for spending a significant amount of time perfecting their stories to create impactful animations.
In addition to scriptwriting, visual development plays a vital role in conceptualization.
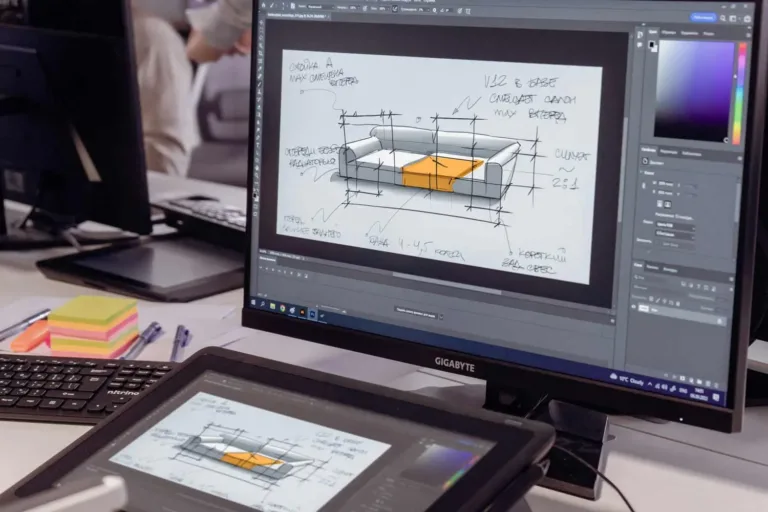
Artists use various techniques such as sketching, digital painting, mood boards, and reference images to visualize their ideas. Storyboards are also created during this phase to outline each scene of the animation. These storyboards serve as blueprints that guide artists throughout the production process by depicting character actions, shot selection, and sequence of events.
Conceptualization lays the groundwork for creating successful 3D animations by ensuring that there is a solid concept in place before moving forward with modeling, texturing, rigging, and animating.
Overall, conceptualization is an essential step in creating 3D animations. It involves developing and refining the original idea or storyline through thorough scriptwriting and visual development. By focusing on creating a strong foundation during this stage, the rest of the animation production process can proceed smoothly.
Step 2: Storyboarding
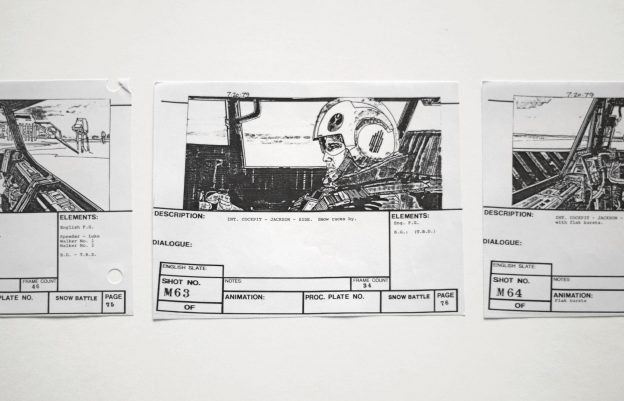
Storyboarding is a crucial phase in the animation production process, where visual representations of the script are created through sketches, serving as a vital blueprint to guide artists throughout the production.
Storyboards are a series of sketches that outline each scene, depicting character actions, shot selection, and the sequence of events. They provide a clear visualization of how the animation will unfold and help ensure that all team members are on the same page.
Not only do storyboards assist in planning camera angles and compositions, but they also allow for any necessary adjustments or changes to be made before moving forward with more time-consuming tasks.
In 3D animation, storyboarding plays an essential role in mapping out camera movements and character interactions within a three-dimensional environment. It helps artists visualize how objects will appear from different perspectives and aids in determining the timing and pacing of each shot.
Software programs like Autodesk Maya offer tools specifically designed for creating storyboards in 3D space, allowing for even greater precision and accuracy when planning out scenes.
By carefully crafting storyboards during this early stage of production, animators can effectively communicate their vision to other team members and ensure that everyone is working towards a unified creative goal.
Step 3: 3D Modeling
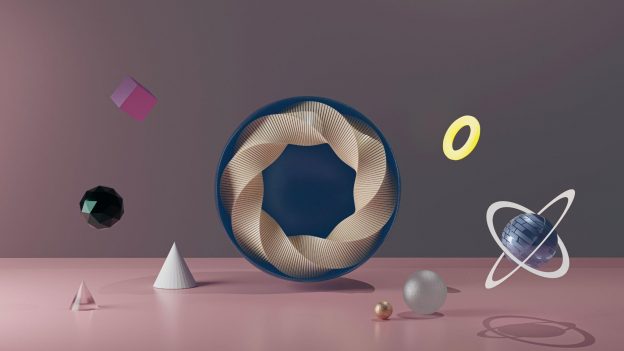
The next step in the 3D animation production process is 3D modeling, which involves creating objects and characters for the animation using software like Autodesk Maya, Z-Brush, and Blender. This stage is crucial as it lays the foundation for the visual elements of the animation.
Here are three key aspects to consider during the 3D modeling process:
1. Defining Shape, Structure, and Features
One potential challenge that beginners may face during this stage is the complexity of defining shape, structure, and features through mathematical representations.
It requires a good understanding of geometry and spatial relationships to accurately create three-dimensional models. Artists must carefully consider proportions, angles, curves, and other details to ensure realistic-looking objects or characters.
2. Software Proficiency
To create 3D models effectively, artists need to be proficient in using software programs like Autodesk Maya, Z-Brush, or Blender. These tools provide a wide range of options for shaping objects and characters. Artists can manipulate vertices on a grid to create complex shapes by extruding or scaling them. They can also use sculpting tools within these software programs to add intricate details.
3. Attention to Detail
Creating detailed 3D models requires attention to detail throughout the entire process. Artists need to focus on adding fine textures and intricate features that make their models appear more realistic or stylized based on their vision for the animation. Paying close attention to small details can significantly enhance the overall quality of the final product.
By mastering these aspects of 3D modeling and utilizing appropriate software tools effectively, beginners can develop their skills in creating compelling objects and characters that will bring their animations to life.
Step 4: Texturing Your 3D Models
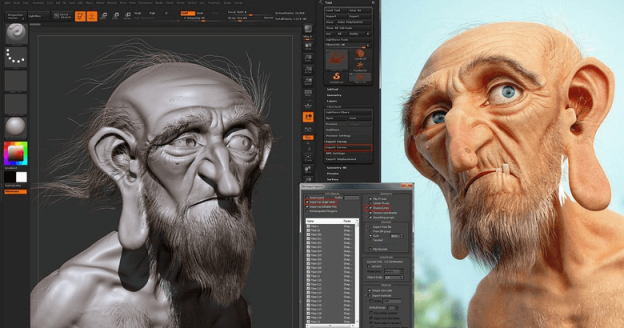
During the process of 3D animation production, the next crucial step is to meticulously apply textures to the previously created 3D models, enhancing their visual appeal and creating a more immersive experience for the audience.
Texturing involves adding color, patterns, and surface details to the objects in order to give them a realistic or stylized appearance. Teams of texture artists work on this phase, using software like Photoshop or Substance Painter to create intricate textures that bring the 3D models to life.
The process of texturing begins with UV unwrapping, which involves flattening out the surfaces of the 3D models onto a 2D plane. This allows artists to paint directly onto these flattened surfaces using specialized software.
Artists can create custom textures or use pre-existing texture libraries to add skin, clothing, hair, metal finishes, or other surface details to their models. They carefully consider factors such as lighting and shading when applying textures in order to achieve a desired level of realism.
The goal is to create visually appealing and believable textures that enhance the overall quality of the animation and make it more engaging for viewers.
Step 5: Rigging and Skinning
Rigging and skinning are essential steps in the 3D animation production process, as they involve creating a skeletal structure for the 3D models and ensuring that their exteriors smoothly cover the internal mechanics.
Rigging is the process of designing a skeleton or rig for the 3D models, allowing them to move realistically. It involves articulating and controlling joints and moving parts, such as limbs and facial features. This step is crucial in giving life to characters or objects within the animation.
Skinning follows rigging, where the objects’ exterior (skin) is adjusted to seamlessly cover the internal mechanics created during rigging. This ensures that when an animator moves a character or object using its rig, it retains its shape and form without any unwanted deformations.
The goal of rigging and skinning in 3D animation is to create realistic movements by providing control over various parts of the model. This allows animators to manipulate characters or objects with ease while maintaining their visual integrity.
Rigging can be done using techniques like Inverse Kinematics (IK), which focuses on achieving specific poses by manipulating end-effectors like hands or feet, or Forward Kinematics (FK), which involves manipulating individual joint rotations directly. The choice between IK and FK depends on the complexity of movement required for a particular scene.
Rigging and skinning are crucial steps in 3D animation production that enable realistic movements of characters or objects. Rigging involves creating a skeletal structure for models, while skinning ensures that their exteriors smoothly cover this structure. These processes provide animators with control over different parts of the model, allowing them to bring characters or objects to life within the animation sequence.
Step 6: Animation

This discussion will focus on the next step in creating a 3D animation, which is the animation itself.
It will cover the basic principles of animation, including keyframes and tweening, as well as various animation techniques used to bring characters and objects to life.
Additionally, it will explore the importance of choosing the right software for 3D animation and how different programs offer unique features and capabilities for creating high-quality animations.
Basic Animation Principles
Animation principles play a fundamental role in creating engaging and realistic 3D animations by guiding the movement, timing, and overall behavior of characters and objects. These principles serve as a set of guidelines that help animators bring life to their creations and make them more believable to the audience.
One key principle is the concept of squash and stretch, which involves exaggerating an object’s shape or form to convey weight, impact, or flexibility. By stretching an object when it moves quickly or squashing it when it lands with force, animators can add a sense of realism and impact to their animations.
Another important animation principle is timing. Timing refers to the speed at which actions occur within an animation. It can be used to create a sense of urgency, tension, or comedic effect.
For example, fast-paced movements can convey excitement or urgency, while slow movements can create suspense or emphasize weightiness. Animators must carefully consider the timing of each action to ensure that it aligns with the desired emotional response from the audience.
In addition to squash and stretch and timing, other basic animation principles include anticipation (preparing for an action), staging (presenting actions clearly), follow-through (continuation of movement after an action), overlapping action (different parts of a character moving at different rates), arcs (natural curves in movement), secondary action (additional actions that enhance primary actions), exaggeration (amplifying certain aspects for emphasis), and appeal (creating visually appealing characters and designs).
Overall, mastering basic animation principles is crucial for anyone looking to create high-quality 3D animations. These principles provide animators with a solid foundation on which they can build their skills and creativity.
Animation Techniques
Animation techniques serve as the building blocks for creating captivating and visually stunning 3D animations. These techniques encompass a wide range of methods and approaches that animators use to bring their creations to life.
One important technique is keyframing, which involves defining specific poses or positions at certain points in time, known as keyframes, and letting the animation software fill in the in-between frames to create smooth motion. This technique allows for precise control over character movements and enables animators to convey realistic actions.
Blending animation is a technique used to smoothly transition between different movements or actions. It involves creating multiple variations of an animation sequence and seamlessly blending them together using interpolation techniques.
This allows for smooth transitions between different poses or actions, resulting in fluid movement that enhances the overall visual appeal of the animation.
Mastering various animation techniques is crucial for creating captivating 3D animations.
Choosing the Right 3D Animation Software
When it comes to 3D animation software, there are several options available in the market. Popular choices include Autodesk Maya, Blender, Cinema 4D, and 3ds Max. Each software offers its own unique set of features and capabilities.
For beginners, Blender is a great option as it is open-source and free to use, making it accessible for those on a budget. It also has an active community that provides support and resources for learning.
However, if you’re looking for more advanced features and professional-grade tools, Autodesk Maya or Cinema 4D may be better suited for your needs. These softwares offer robust capabilities in areas such as character rigging, particle effects, and rendering options. They are widely used in industries such as film production and game development.
Additionally, consider factors such as ease of use, compatibility with your computer system, availability of tutorials or training resources, and overall user experience when choosing your 3D animation software.
Once you have selected the right software for your needs, you can begin working on bringing your ideas to life. This involves tasks such as video editing to refine timing and scene transitions between shots. You can also incorporate sound effects to enhance the overall impact of your animated video.
Step 7: Bringing Your Scene to Life
The Art of Lighting in 3D Animation
Lighting plays a crucial role in 3D animation, as it enhances the visual quality of objects and scenes by creating depth, highlighting details, and setting the overall mood.
In 3D animation, lighting is not just about illuminating a scene; it is an art form that requires careful consideration and technical expertise.
There are various techniques used to achieve effective lighting in 3D animation, such as global illumination, ambient occlusion, and shadow mapping.
Global illumination simulates the way light bounces off surfaces in real life, resulting in more realistic and natural-looking scenes.
Ambient occlusion adds depth and realism by darkening areas where objects come into close contact with each other.
Shadow mapping creates shadows that accurately represent the position of light sources in the scene.
To create successful lighting in 3D animation, artists need to understand how different types of lights work and their effects on objects.
Common types of lights used include point lights, spotlights, directional lights, and area lights.
Point lights emit light from a single point in all directions equally and are ideal for replicating light bulbs or small light sources like candles.
Spotlights emit light in a specific direction with adjustable focus and intensity; they are commonly used to highlight specific areas or objects within a scene.
Directional lights simulate parallel rays of sunlight or moonlight to create long shadows and add overall illumination to a scene.
Area lights have a defined shape (such as rectangular or circular) that emits light uniformly over an area; they are often used for soft lighting or creating realistic window reflections.
Understanding the art of lighting is essential for creating visually appealing 3D animations.
By utilizing various techniques such as global illumination, ambient occlusion, and shadow mapping along with different types of lights like point lights, spotlights, directional lights, and area lights artists can bring their scenes to life by adding depth, emphasizing details effectively setting the mood for their animations.
Mastering the art of lighting requires both technical expertise and artistic sensibility, as it involves a delicate balance between realism and creative interpretation.
Creating Realistic 3D Environments
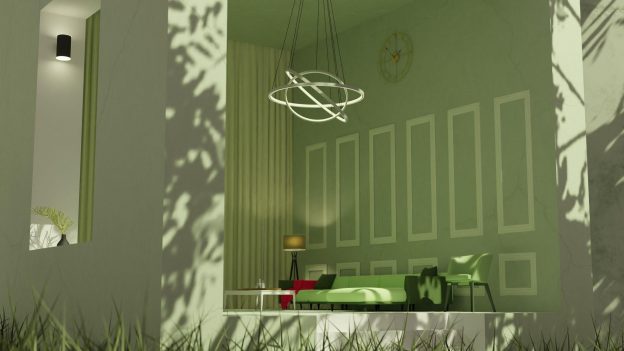
Creating realistic 3D environments requires meticulous attention to detail, technical proficiency in modeling and texturing, and the use of state-of-the-art software programs.
To create a convincing 3D environment, artists must carefully consider factors such as lighting, texture mapping, and the placement of objects within the scene. They need to pay close attention to scale, proportion, and perspective to ensure that the environment looks believable and immersive.
The process typically begins with modeling, where artists create the basic geometry of the environment using polygons. This involves defining shapes, structures, and features through mathematical representations.
Once the basic structure is in place, texturing comes into play. Texture artists work on adding color and surface details to enhance realism.
Lighting is another crucial aspect of creating realistic 3D environments. Artists use techniques like global illumination and physically based rendering to simulate real-world lighting conditions accurately.
By combining meticulous attention to detail with technical expertise artists can create stunningly realistic 3D environments that captivate audiences and bring their visions to life on screen.
Step 8: Rendering
Rendering is a crucial stage in the 3D animation process as it applies the render equation to generate the final sequence, incorporating elements like shading, texture mapping, and motion blur to enhance realism and bring the animated world to life.
During rendering, various aspects of the 3D scene are calculated and combined to create each frame of the animation. Here are three key aspects of rendering that contribute to the overall quality and visual appeal of a 3D animation:
1. Shading
Shading involves determining how light interacts with objects in the scene, including their surfaces and materials. This process calculates factors such as reflection, refraction, transparency, and shadows to create realistic lighting effects.
2. Texture Mapping
Texture mapping refers to applying images or textures onto 3D models’ surfaces to give them detailed appearances. This can include adding patterns, colors, or even complex surface imperfections that contribute to a more lifelike feel.
3. Motion Blur
Motion blur is used to simulate the blurring effect that occurs when objects move quickly in real life. It adds a sense of motion and fluidity by creating streaks or smudges around moving objects.
By carefully adjusting these rendering parameters and techniques, animators can achieve higher levels of realism and immersion in their animations.
Rendering plays a vital role in bringing together all the elements created during previous stages such as modeling, texturing, rigging, and animation into a cohesive final product.
Overall, rendering is an essential step in the 3D animation process as it adds depth and realism by incorporating shading techniques, texture mapping for detailed appearances on surfaces, and motion blur for fluid movement effects.
Through careful manipulation of these aspects during rendering, animators can create visually stunning animations that captivate audiences’ attention while providing an immersive experience.
Step 9: Post-Production and Effects
In the post-production and effects stage of creating a 3D animation, several key points come into play.
Compositing for Visual Effects (VFX)
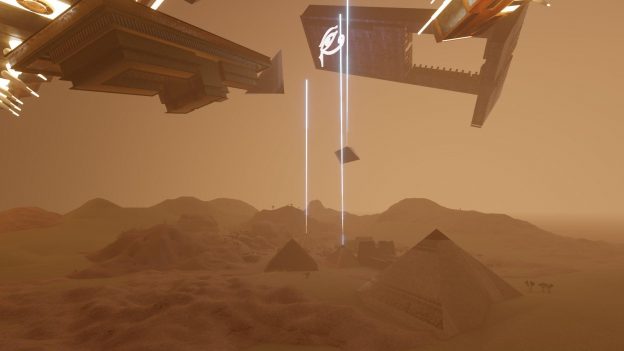
Compositing for Visual Effects (VFX) brings together multiple render passes to seamlessly integrate lighting, shading, and other visual elements into the animation, making it almost impossible for viewers to distinguish between real and computer-generated imagery.
This stage in the 3D animation production process is crucial for enhancing the overall visual quality and realism of the animation.
Here are three key aspects of compositing for VFX:
Overall, compositing plays a vital role in elevating the quality of 3D animations by bringing together all visual components into a cohesive whole. Through careful adjustment of lighting and shading effects while integrating complex visual elements seamlessly, skilled compositors enhance both realism and artistic vision in a way that captivates viewers’ attention.
Adding Sound and Music to Your Animation
The addition of sound and music to a 3D animation brings the visual elements to life, creating a fully immersive experience for viewers. Sound design plays a crucial role in enhancing the storytelling and emotional impact of an animation.
By adding appropriate sound effects, such as footsteps, explosions, or environmental sounds, the audience is able to feel more connected to the on-screen action. Additionally, music serves as a powerful tool for setting the mood and tone of a scene.
Whether it’s a suspenseful melody during a thrilling chase sequence or a soft, melancholic tune in an emotional moment, the right choice of music can evoke strong emotions and enhance the overall impact of an animation.
In order to incorporate sound and music into a 3D animation, artists typically work with composers and sound designers who specialize in audio production. The process involves composing original scores that complement the visuals and align with the intended narrative.
Foley recording is also utilized to create custom sound effects that match specific actions or movements within the animation. These recorded sounds are then mixed together with dialogue tracks and music to create a cohesive audio experience.
With careful attention paid to synchronization between visual cues and auditory elements, the addition of sound and music completes the immersive nature of 3D animations, providing viewers with a truly captivating experience.
Editing Your 3D Animation Masterpiece
Editing plays a vital role in fine-tuning the timing, scene transitions, and sound synchronization, ensuring that the animation flows smoothly and effectively conveys the story. It is during this stage that you have the opportunity to bring all the elements of your animation together and create a cohesive final product.
In the editing process, you will work with software like Adobe Premiere Pro or Final Cut Pro to arrange and manipulate your animated sequences. You can trim or extend scenes, adjust the pacing by altering shot lengths or adding pauses between actions, and rearrange shots for better storytelling flow.
This stage also allows you to make any necessary changes or corrections before rendering out the final version. Additionally, you can synchronize sound effects and music with specific actions in your animation to enhance its overall impact.
Overall, editing is an essential step that brings together all aspects of your 3D animation production. It allows you to refine and polish your work so that it effectively communicates your intended message to viewers.
Advanced Techniques
Advanced Texturing and Materials
Advanced Texturing and Materials in 3D animation involve the application of intricate surface details and realistic materials to enhance the visual quality and believability of objects and characters. This stage focuses on adding color, texture, and other surface properties to the 3D models created in the previous steps.
Texture artists play a crucial role in this process. After UV wrapping, they paint directly onto the map, adding colors, patterns, and fine details to bring out the desired look and feel of each object or character.
Additionally, advanced material creation techniques are used to simulate realistic surfaces such as metal, glass, fabric, or skin.
These materials can be achieved through a combination of texture maps (such as diffuse maps for color information), normal maps for simulating surface bumps or wrinkles), specular maps (for controlling how light interacts with different areas of an object), and other specialized maps.
Overall, advanced texturing and materials work together to elevate the visual quality of 3D animations by making objects appear more lifelike and believable.
By applying intricate surface details and realistic materials accurately, animators can create visually stunning animations that captivate audiences’ attention while enhancing their overall viewing experience.
Character Animation: Expressions and Emotions

Character animation is a crucial aspect of 3D animation, as it brings life and emotion to the digital characters. It involves creating movements that accurately represent expressions, gestures, and actions of the characters. This requires a deep understanding of human anatomy and movement mechanics.
Animators use various techniques to achieve realistic character animation, including blocking, refining, and polishing.
Blocking is the initial stage where animators establish the key poses and timing of the character’s movements. They define the main actions and expressions to create a rough representation of how the character will move throughout the scene.
Refining comes next, where animators focus on adding more details to enhance the fluidity and realism of movements. They adjust curves, add secondary animations like hair or clothing movement, and refine facial expressions for more nuanced emotions.
Finally, polishing involves fine-tuning every aspect of the animation to ensure smooth transitions between poses and seamless integration with other elements in the scene.
To create engaging character animations that resonate with audiences’ subconscious desire for freedom, animators need not only technical skills but also an artistic sensibility.
They must understand how different body parts interact with each other during various actions and expressions. This knowledge allows them to accurately convey emotions through subtle movements such as eye blinks or changes in posture.
By mastering these techniques, animators can breathe life into 3D characters and capture viewers’ attention by evoking relatable emotions.
Simulations and Dynamics in 3D Animation
Simulations and dynamics are essential components of 3D animation, allowing for realistic physics-based interactions that captivate viewers with their lifelike movements and immersive experiences. Simulations involve replicating real-world phenomena, such as gravity, collisions, and fluid dynamics, within a 3D environment.
These simulations can be applied to various elements in an animation, including objects, characters, and environments. By accurately simulating the physical properties of these elements, animators can create scenes that feel authentic and believable.
One common use of simulations in 3D animation is for cloth or fabric movement. Through simulation techniques like cloth dynamics or soft body dynamics, animators can achieve realistic draping and flowing effects on characters’ clothing or other fabric-based objects. This adds an extra layer of realism to the animation by ensuring that the clothing reacts naturally to the character’s movements and external forces.
Other examples include simulating hair or fur movements using dynamic systems or creating realistic particle effects like fire, smoke, or water splashes.
In addition to simulations, dynamics play a crucial role in 3D animation by governing how objects interact with each other and their environment.
Dynamics allow for the creation of complex animations involving rigid bodies (objects that maintain their shape) and constraints (restrictions on object movement).
Animators can simulate realistic collisions between objects or create dynamic chains of interconnected objects where one’s movement affects others’. These dynamic interactions contribute to the overall visual appeal and immersion of the animation by adding depth and complexity to the scenes.
By mastering these techniques, animators have greater creative freedom in crafting captivating visuals that engage audiences on a deeper level.
Real-time 3D Animation Techniques
Real-time 3D animation techniques revolutionize the way animated content is created, allowing for immediate rendering and interactive experiences that seamlessly blend virtual objects with real-world environments.
With real-time animation, artists can see their creations come to life in a matter of seconds or minutes, eliminating the need for time-consuming renders. This technology has become increasingly popular in video games and virtual production, where the ability to make changes on-the-fly and respond to user input is crucial.
One of the key advantages of real-time 3D animation is its ability to create immersive and interactive experiences. Real-time animations also allow for seamless integration of virtual objects into live-action footage or augmented reality experiences, creating a more convincing blend between the digital and physical realms.
Real-time 3D animation techniques have transformed the way animated content is produced by offering immediate rendering capabilities and interactive experiences. This technology allows artists to create immersive environments that react in real-time to user interactions, enhancing storytelling possibilities and blurring the line between virtual and physical realities.
As this technology continues to evolve, we can expect even more advanced features and applications in various industries such as gaming, film production, advertising, education, and beyond.
Conclusion

Creating 3D animations is an exciting journey that requires a combination of artistic vision and technical skills. Throughout this beginner’s guide, we have explored the basics of 3D animation, from understanding its definition to distinguishing it from 2D animation.
We have also delved into the step-by-step process of making 3D animations, covering everything from conceptualization to post-production. By following these steps, you can bring your imagination to life and create captivating animated scenes that will leave viewers in awe.
The world of 3D animation offers endless possibilities for creativity and storytelling, allowing you to transport your audience to fantastical worlds or recreate realistic environments with astounding detail. With dedication and practice, you can master advanced techniques in 3D animation and take your creations to new heights.
If you’re looking to make beautiful 3D animations for your business, we may have exactly what you’re looking for.
work with reputable professionals to make beautiful 3D animations for your business, whether it’s for marketing, presentation or introductions, feel free to give us a call. We’ll be more than happy to help you hit your animation goals.
Frequently Asked Questions
How long does it typically take to create a 3D animation from start to finish?
The time it takes to create a 3D animation from start to finish can vary significantly depending on the complexity of the project and the resources available. It can range from several weeks for a simple animation to several months or even years for a more complex production.
What are some common challenges that beginners face when learning 3D animation?
Some common challenges that beginners face when learning 3D animation include understanding complex software, mastering the technical aspects of modeling and rigging, grasping the principles of movement and timing, and developing artistic skills.
What are some examples of industries that use 3D animation in their work?
Industries that utilize 3D animation include gaming, film and television production, advertising and marketing, architecture and engineering, medical visualization, scientific research, virtual reality development, and educational institutions. These industries employ 3D animation for various purposes such as entertainment, simulation, visual communication, and training.
Are there any specific software programs or tools that are recommended for beginners in 3D animation?
When starting out in 3D animation, it is recommended for beginners to use software programs like Autodesk Maya, Blender, and Cinema 4D. These tools provide a range of features and functionalities that are essential for creating stunning 3D animations.
Are there any specific skills or qualifications that employers look for when hiring 3D animators?
Employers in the 3D animation industry typically look for skills such as proficiency in software programs like Maya or Blender, knowledge of modeling and texturing techniques, strong understanding of animation principles, and the ability to work effectively in a team.
